As of this writing, I’m using 64-bit Rocky Linux 8.4 that came with GNOME by default.
Since this version already has the GUI that is GNOME, this will mainly work for the settings I have. I know there are issues if you use other GUI packages.
Setup EPEL Repository
First, become the root user since the setup requires superuser privileges.
su -
Run update to make sure your install is up-to-date
yum update
Run the following command to install EPEL Repository
yum install epel-release
Install and Enable XRDP
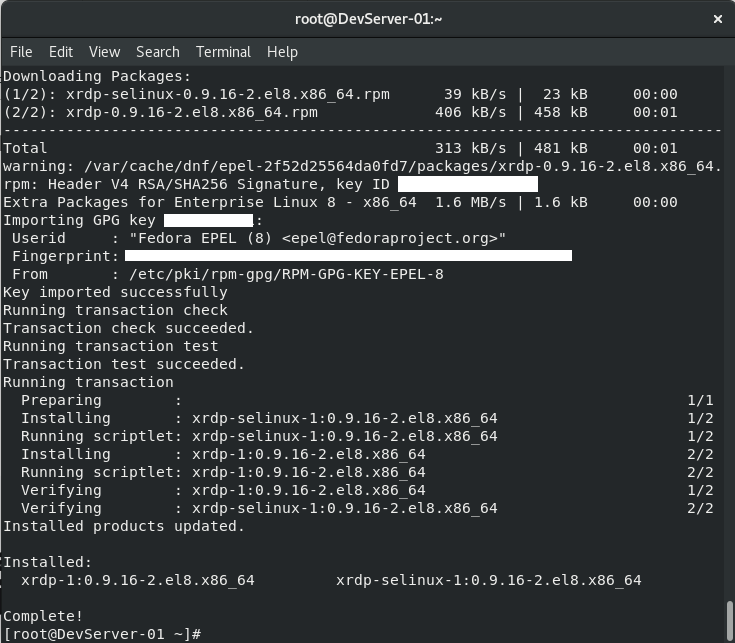
Now you can enable EPEL Repository and install Xrdp server using the following command
dnf --enablerep=epel -y install xrdp
After the installation is done, enable xrdp using the following command
systemctl enable xrdp --now
Firewall Configuration
Also, let xrpd go through the firewall. Assign the correct port if you are not using the default 3389 for TCP.
firewall-cmd --add-port=3389/tcp
Make the rule permanent using the following command
firewall-cmd --runtime-to-permanent
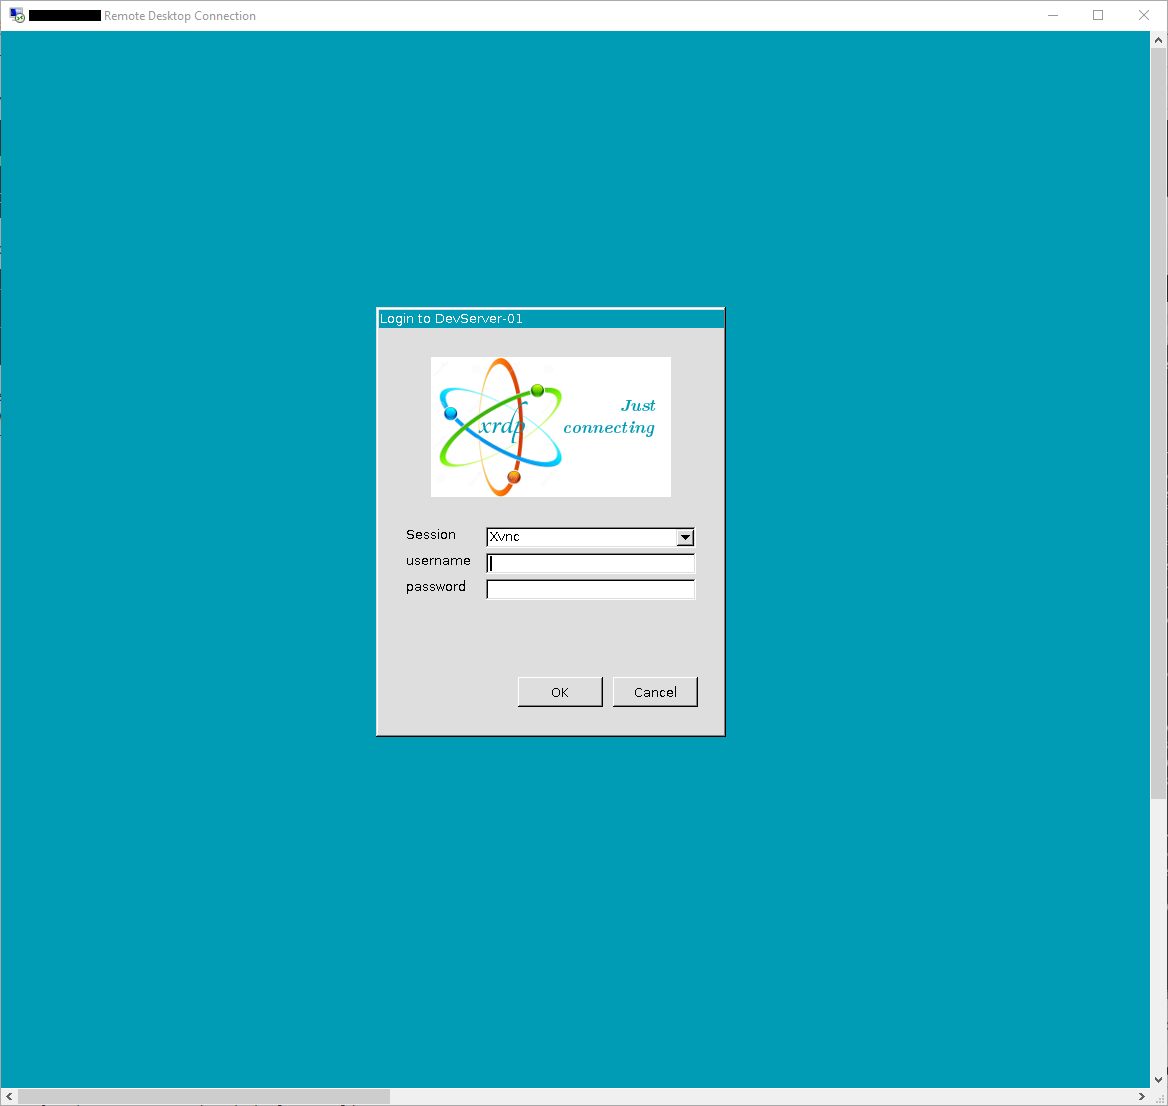
Connect Using Windows RDP
Now you should be able to connect to Rocky Linux using Windows RDP. Make sure that the user you are using for login is not already logged in on the server or the RDP session won’t connect.
Hyper-V is a virtual machine module from Microsoft similar to Sun/Oracle VirtualBox or VMWare ESX. Hyper-V is a Type 1 Hypervisor that runs directly on the host machine’s hardware rather. This is different from Type 2 Hypervisor which the virtual machine’s commands are managed through the host running the virtual machine.
Why use Hyper-V?
If you are already running Windows 10 Pro or Windows Server, Hyper-V is free to use and it’s very easy to install. For the setup to run Rocky Linux 8.4 in this article, I’m using Hyper-V on Windows 10 Pro since I don’t have access to a Windows Server machine. Windows 10 Home doesn’t allow Hyper-V, unfortunately.
Download Rocky Linux (8.4)
At the time of this writing, Rocky Linux 8.4 is the latest stable release. Rocky Linux is likely going to be the chosen replacement for Centos OS 8 as the upgrade path now that Red Hat has officially killed the Centos project. Red Hat doesn’t want Centos to compete with RHEL anymore so it moved to CentOS Stream. CentOS Stream is a continuously updating distribution which is a problematic upgrade because there’s no more stable release. Although CentOS Stream continuously updates, it’s staying within the confine of the RHEL major version release.
Unfortunately, CentOS Stream is being treated as a development branch of RHEL which means that it’ll see all the bugs first before RHEL. Most users use CentOS because it’s tracking AFTER a stable release of RHEL.
Back to Rocky Linux, it’s emerging as the main replacement for CentOS. It’s started by CentOS co-founder and a the hardcore veteran Gregory Kurtzer. He and thousands of developers took the lessons learned from CentOS and its demise to create Rocky Linux. Hopefully, we won’t suffer the same fate that Red Hat dealt with CentOS because it had a conflict of interest. Mainly money-grabbing, but who knows?
Select the x86_64 DVD distribution to get the iso we need to run on Hyper-V. The minimal package runs into problems when trying to install in a virtual machine.
Installation
First you must enable Hyper-V in Windows 10. There are a couple of ways to do it, but using Windows Shell is pretty straightforward. Launch Windows Shell as an Administrator.
A restart will be required to get Hyper-V working. Select Y to restart your computer after Hyper-V is enabled.
After Windows restarted, type in the search bar “Hyper-V” and select “Hype-V Quick Create”. This will launch a Create Virtual Machine module.
Uncheck the “This virtual machine will run Windows (enables Windows Secure Boot)”.
Click on the “Change Installation source” and select the Rocky Linux iso we downloaded earlier. Click “Create Virtual Machine” after the iso file is chosen.
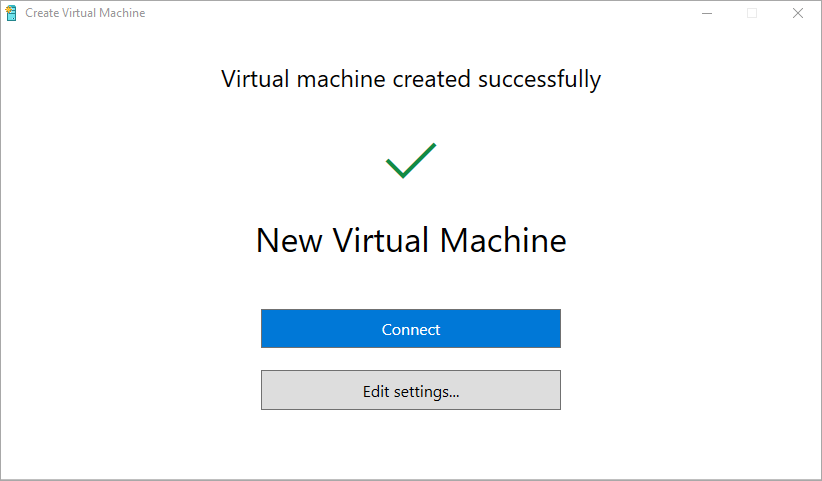
Depending on your computer’s specs, the installation could be very fast. On my system, it only took a few seconds for the new virtual machine to be created.
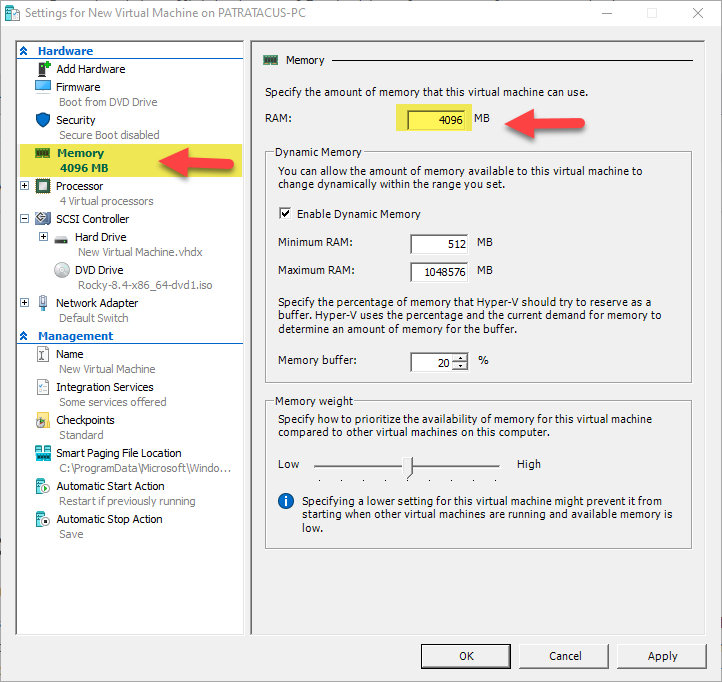
Click “Edit settings …” to edit our new VM. It’s very important to make sure that the allocated RAM is at least 4 Gigabytes or you’ll have problems running Rocky Linux on the VM. By default, the new VM is only created with 2GB or RAM allocated.
You can also locate the virtual machine media in a different location. By default, it’s putting the image in your user profile which is not an ideal location. Click on the Hard Drive option on the menu bar on the left. Click “New” under the virtual hard disk option and then follow the steps to create your new virtual hard drive media location.
Connect To VM
Now that everything is ready to go, click on the “Connect” button to connect to our VM. Click the “Start” button on the screen to launch the VM.
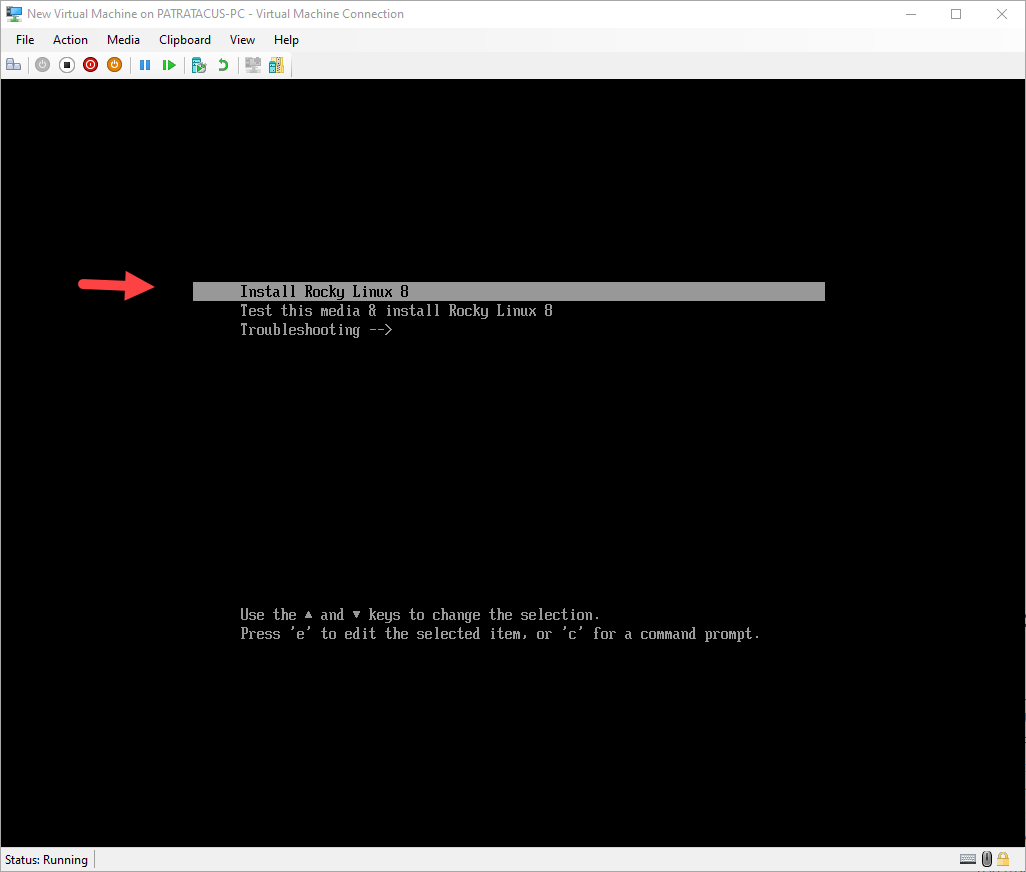
After a few seconds, the Rocky Linux 8 install option should show up. Make sure you either disable the firewall or letting the Hyper-V VM go through the firewall to get it running. Select “Install Rocky Linux 8” option and hit Enter to start.
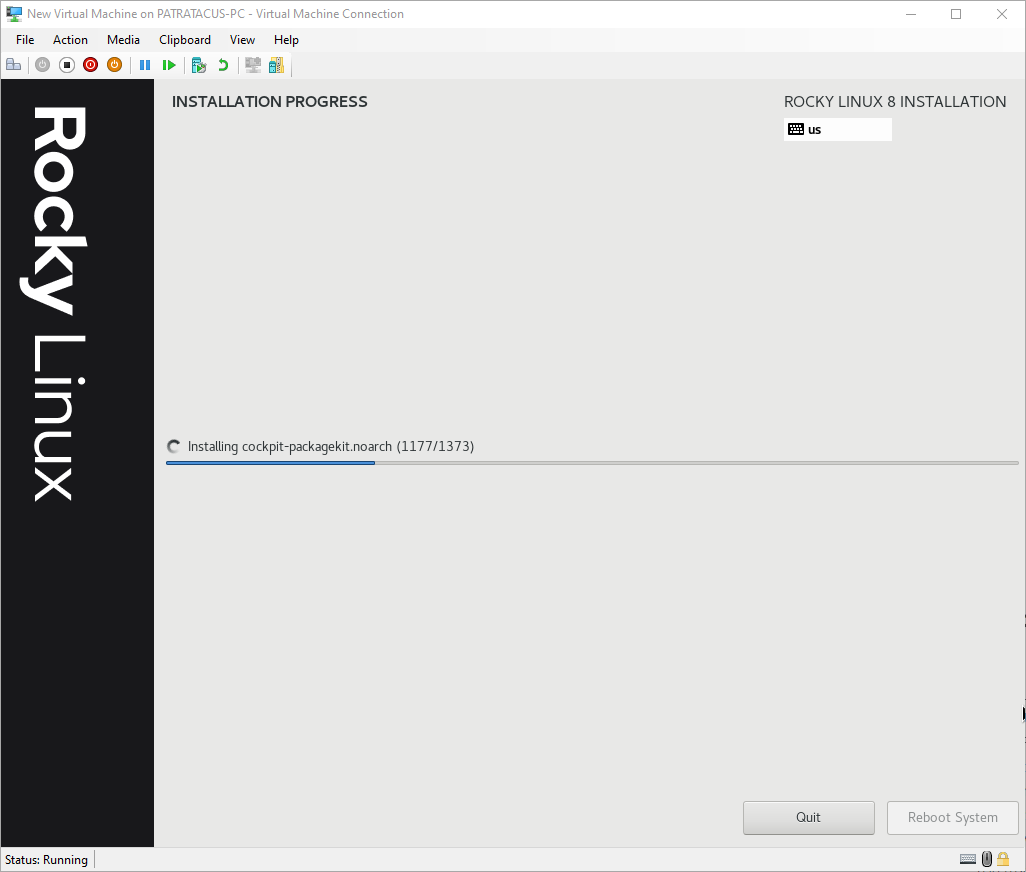
If it runs correctly, you should be presented with the Rocky Linux 8 Installation. Go through the setup steps
I won’t cover all the installation details here since everyone has his/her own preferences for the server. Let the installation run and you’ll have a Rocky Linux 8.4 Server on Hyper-V in no time.
I had to shutdown the VM when the automatic reboot seems to be stuck. After shutting down and re-starting the VM again, it lets me complete the configuration of the server and then accept the license.
All done! Enjoy!
One issue that you may encounter while running the new server is no internet connection. The issue is that the “Default Switch” might not be configured for the external internet connection. When you first created the VM, if you chose the switch to be “Default Switch”, it’d likely have an Internal network connection.
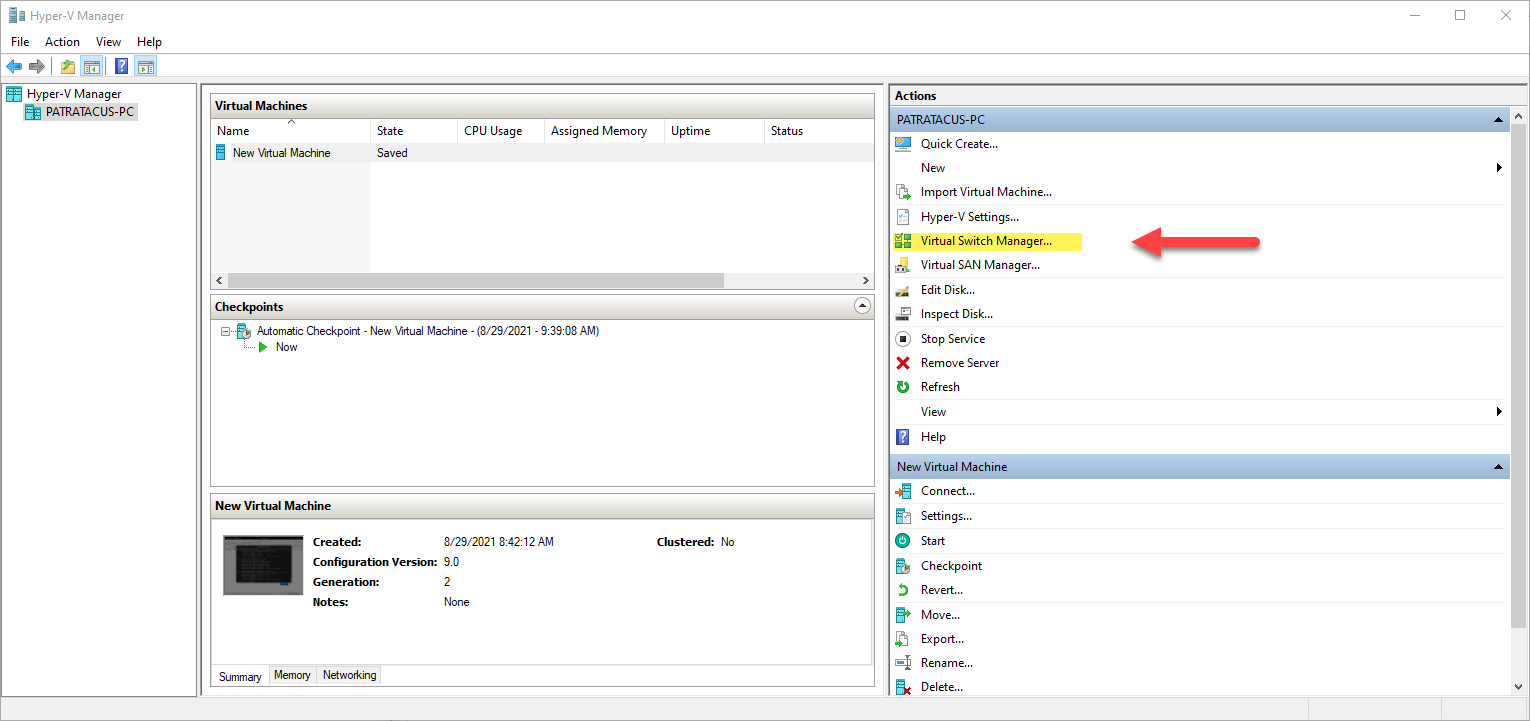
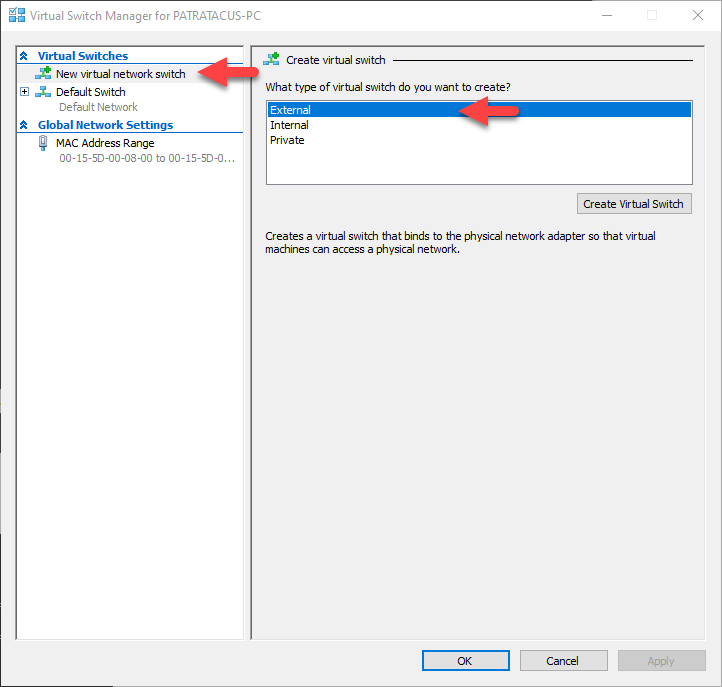
First, suspend and shut down your VM so you can make modifications to the settings. You can add a new switch by opening up Hyper-V Manager. Click on the “Virtual Switch Manager …” from the Actions menu on the right.
Select “New virtual network switch” option and make sure you choose “External” as the type then click “Create Virtual Switch” button.
I named the switch “INTERNET” to quickly differentiate it from the default switch. Make sure that you check the box for “Allow management operating system to share this network adapter”.
Click OK to accept the changes. Select “Settings …” for your vm from the Hyper-V Manager.
Choose the Network Adapter option from the left menu and change the Virtual Switch option to the newly created “INTERNET” switch. Click OK on Apply to accept the change.
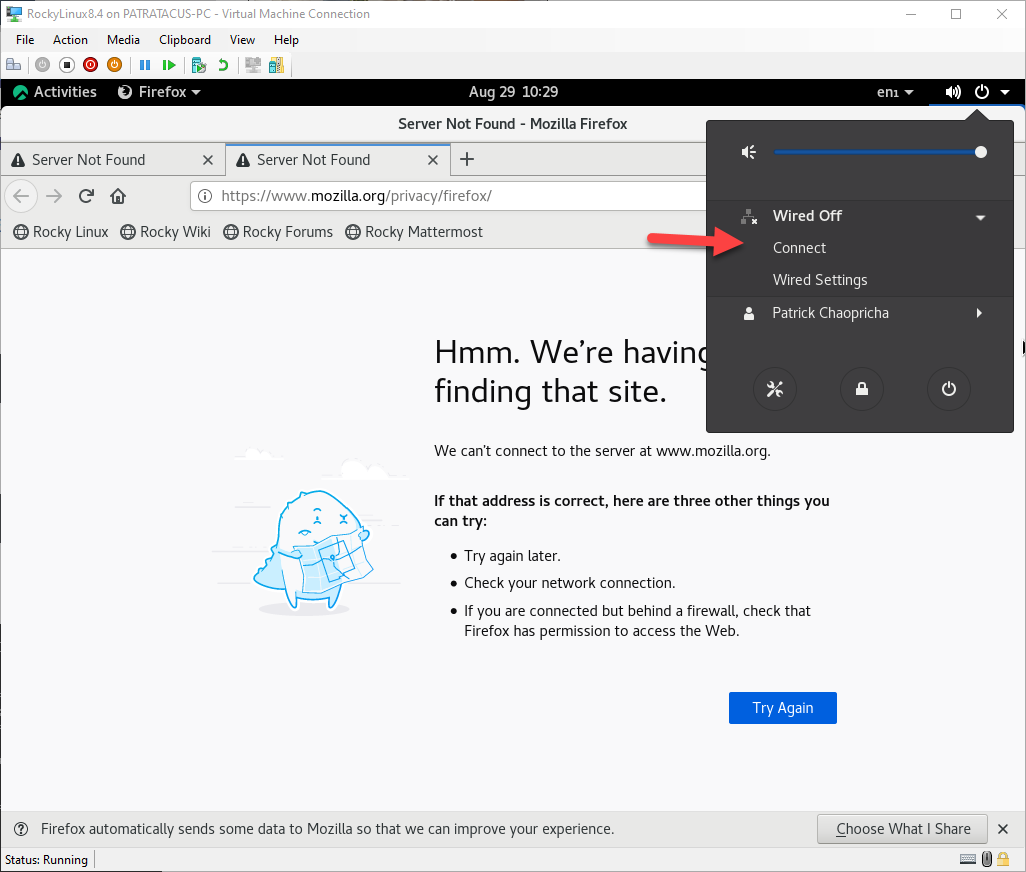
Now you can start your vm again and check whether you now have an internet connection in your Hyper-V. Also make sure that your connection is enabled. Click “Connect” if your connection was off.
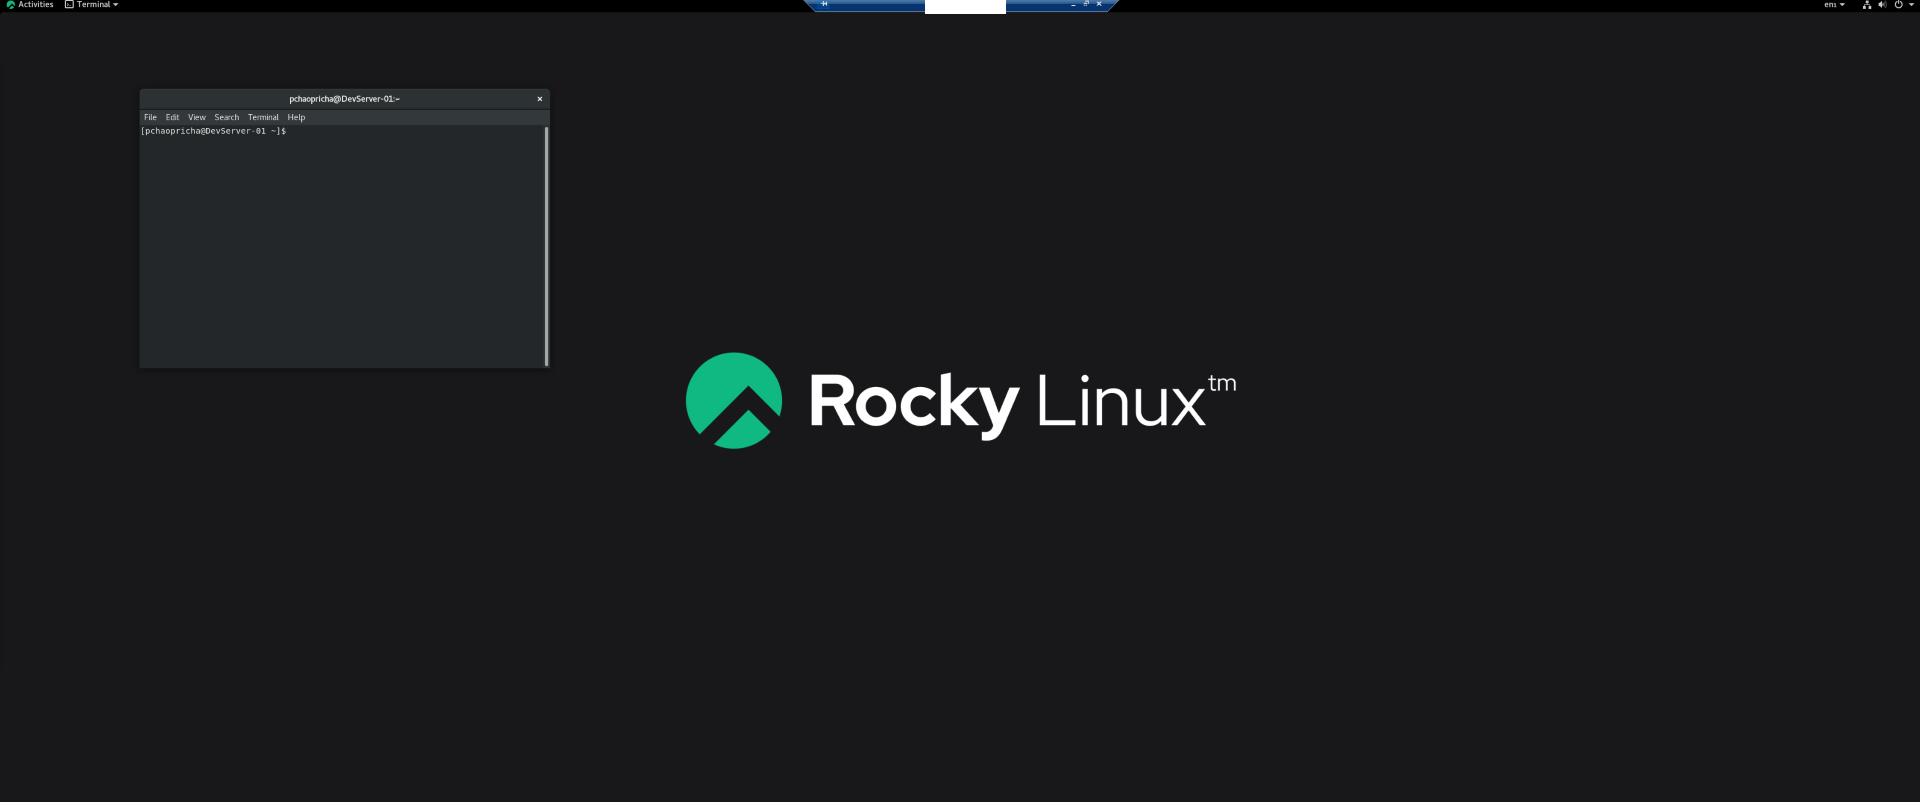
If everything goes well, you should now be able to connect to the internet in your VM.
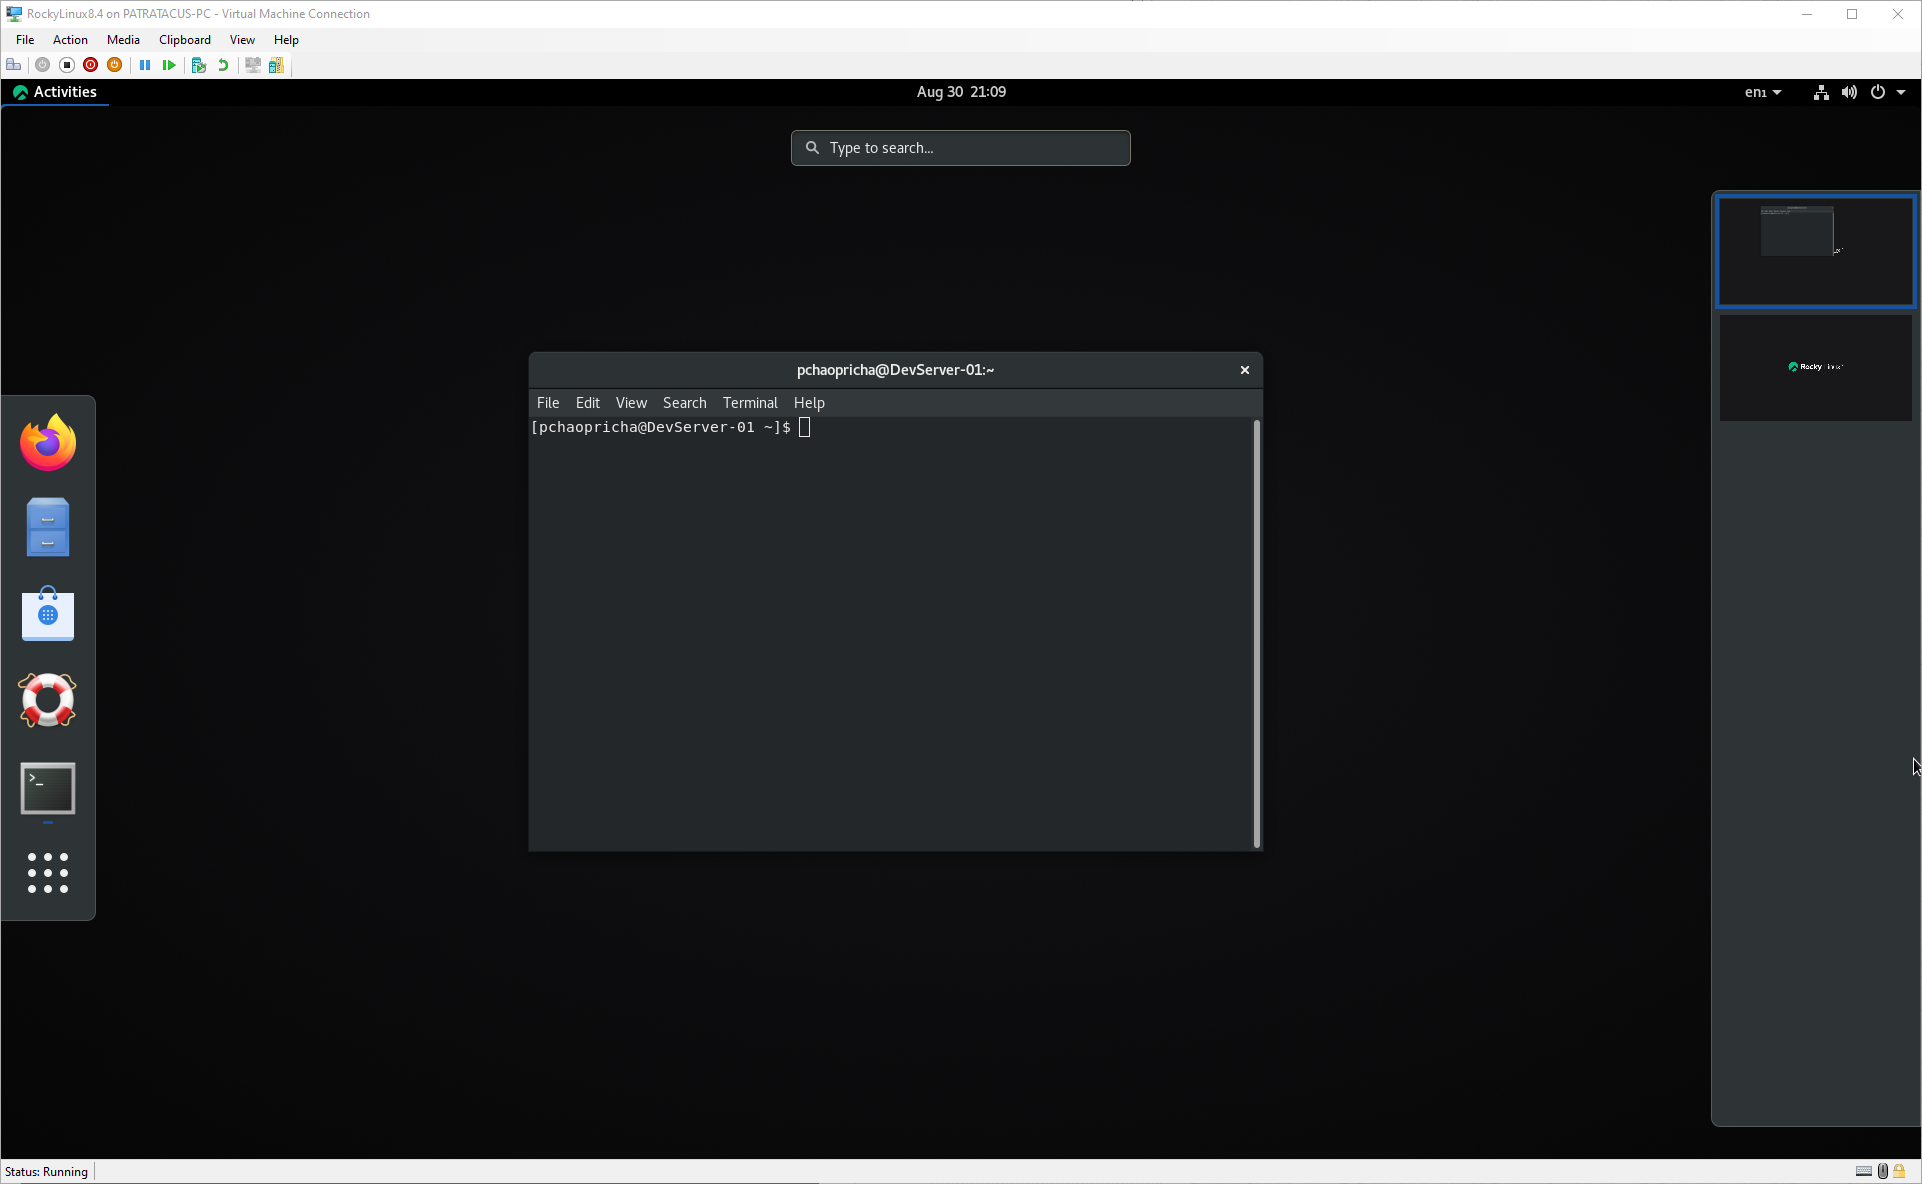
One thing I noticed on my 4k resolution monitor is that the Hyper-V window containing Rocky Linux is running is a much lower resolution than I want. Since this is GNOME by default, we can increase the resolution using the following command: