I just tried enabling WSL on a new Windows 10 computer today using the instructions I wrote in the post last year and found out that when you launch bash you no longer get to install Ubuntu automatically.
Now you need to download the install from Windows Store which I despise and it doesn’t even let me click the link. Luckily there’s a way around getting the install from Windows Store. You can download the install file directly from the providers of the distros. Click on the link of the distro you prefer. In my case, I picked Ubuntu 18.04.
Once you download the file, just launch it to get the setup going. There’s not much of an indication message during the install so wait a while and click Enter and it would ask for you UNIX username and password. After that the installation is done.
I believe there’s a way to install more than one distro but I’m not going to get into that in this post.
After you have Ubuntu installed, you can follow the previous post to get X-11 server for display output and Anaconda working on WSL.
I posted about how to enable WSL on Windows 10 a while back. At the time, the included Ubuntu Linux version would have been Ubuntu 14.04.5 LTS. It’s been a while and WSL has matured to get to newer version. Why upgrade to a newer version of Ubuntu? So we can take advantage of new features offered such as using SciPy and other modules in Python. Other Linux distributions are now also supported in WSL but I’m not going to cover them in this post.
So let’s upgrade our Ubuntu to the latest version and then I’ll cover installing Xming Server so we can use graphical output needed for Matplotlib. Yes, although not officially, we can now have graphical output in WSL through a 3rd party program which is a good start.
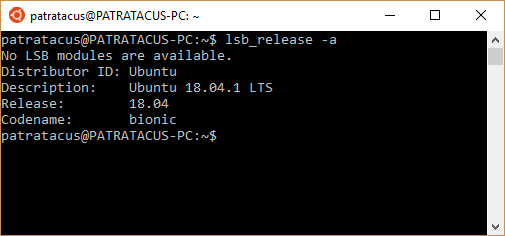
First, check to see what version of Ubuntu we have. Enter the following command in WSL bash: $ lsb_release -a This should return the information on the Ubuntu version we have
Just for fun, we can also check what version of Windows we have using the following command: $ cmd.exe /c "systeminfo" | grep "^OS Version"
Right here alone makes it worth while using WSL. Can’t do grep in command prompt but here we can.
Once we confirmed that we have the older version, let’s update to the latest version by typing in the following commands: $ sudo -S apt-mark hold procps strace $ sudo -S env RELEASE_UPGRADER_NO_SCREEN=1 do-release-upgrade
This will go through a bunch of fetching and about a couple of minutes in it’ll prompt you to continue with the installation since this will take a couple of hours. After all we are replacing the entire Ubuntu version here. Type in Y to continue and now let it run for a while. There might be several more prompts later so don’t go away and expect it to be done when you get back.
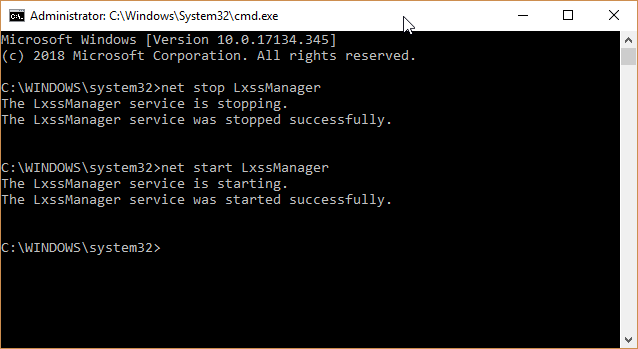
At the end, you’ll need to reboot WSL. With the newer version of WSL, closing the bash window won’t stop all the services. You can manually stop and restart WSL using command prompt (with Administrative Rights). Close the Bash window and then Run command prompt as Administrator and then type in the following commands:
net stop LxssManager net start LxssManager
Relaunch WSL and check your Ubuntu version again. At the time of this post, I have 16.04.5 LTS (xenial) using this method. I guess that it doesn’t jump right from 14.04 to 18.08 in one upgrade. I do know that 18.08 version is available so we need to do more to update to the latest version. We’ll do the following commands to bring 16.04 up-to-date:
$ sudo apt update -y # makes apt system up-to-date $ sudo apt upgrade -y # upgrades/makes up-to-date current Ubuntu 16.04 packages
Now we do another update to make sure everything is good and then do another release upgrade.
$ sudo apt update && sudo apt -y upgrade
If more packages are found and need to be upgraded then you need to do it or it won’t let you upgrade to the next release. While I was doing this, there were 2 packages that could be upgraded but didn’t because they were kept back for some reasons. You can install them manually using:
$ sudo apt-get install
In my case, I hade procps and sudo packages that need to be install. I think it’s maybe because I made some modification to them in the previous version and I did ask the installer to keep my local configurations from before. Maybe it would been better to just install fresh config when I did the upgrade. Once the installs are done, try running the update again to see if there’s anything left to upgrade.
Once you have nothing to update/upgrade, it’s time to get to the next version 18.04.
$ sudo do-release-upgrade
Again this will take a while. We’ll have to do the same process as before and then check the version again. Once we have 18.04, we are done! (for now until the next release).
Installing Xming X11 Server: Head over to Source Forge and install Xming to allow graphical output for WSL. After the installation is done, modify the system configuration file using the following command: $ sudo nano ~/.bashrc Add at the bottom of the file the following lines
export DISPLAY=localhost:0.0
Block external IP access so that we know our X-server is secured
Windows firewall might pop up here. Choose to only allow local traffic and block it from going outside since the X-server runs locally and there’s no need to have it be exposed to the outside world for security precautions. Set the scope to just your local IP 127.0.0.1
Launch X-server and have it run in the background. You should see a little icon for Xming in the running program icon box. Try installing some X-11 programs using the following command:
$ sudo apt-get install x11-apps
Now run a sample program like Xcalc:
$ xcalc
You should see a calculator program showing up on your desktop. You can move it around just as you do as a normal windows program!
If you have an error with “no display output”, check that the firewall is correctly enabled for the local host connection. You can also make sure that the display is correctly set up by sending this command:
$ export DISPLAY=localhost:0.0
Installing Anaconda: Now that we have the graphical output, we are ready to use Matplotlib, but trying to manually install all the dependencies is quite annoying to deal with. Therefore, we’ll install a python package like Anaconda so that we get everything we need for python using the “conda” command. Since this is 2019, let’s use Python 3.x. I think it’s about time to move on to the new version since I have been stuck using 2.x for the last decade.
First, install Anaconda with wget. Let it sift through all the servers until it finds what it needs. Might take a while so sit back and relax.
After the it found the package it needs, execute the installation:
$ bash Miniconda3*.sh
Just watch the installation process and at some point you’ll have to supply a Y to proceed with the installation.
Now run the following lines to update Qt 5 and get the latest configuration of Anaconda to prevent errors with Qt5.6 WebKitEngine error that people get if they want to launch Spyder IDE.
sudo apt-get install python-pyqt5.qtwebkit
After this is done, you should be able to launch Spyder IDE with Spyder command, but let’s wait until we install all the great packages to use in Anaconda first. Get all the packages we need for data science:
After the installation is done, now you can launch Spyder IDE:
$ spyder
If you run into problems with the ModuleNotFoundError: No module named ‘PyQt5.QtWebKitWidgets’, run this command (*Warning: this will break MatPlotlib! There’s no solution at the moment because the newest Matplotlib uses the new Qt 5.9 but this causes problem with Spyder):
conda update qt pyqt -c conda-forge
After the installation is done, it should fix the problem. Try launching Spyder IDE again and you should now have the program on your desktop.
One thing to note is that sometimes after you exit Spyder IDE, the program might still be there and you can no longer launch it again. To kill it, just exit X-server by Right clicking the X-server icon in the Icon Tray and click Exit. It will give you a warning about terminating all the program running on X-server. This will terminate Spyder display running on X-server. Close out the bash window and use command prompt to stop and re-start the service so that we don’t have any more programs running in the background.
Start X-server first and then the bash window again. You can also check to make sure that there’s no more file associated with Spyder:
$ cd ~/.spyder or
$ cd ~/.spyder-py3
If this does exist, the remove the lock by using this command:
$ rm -f spyder.lock
Now you should be able to start Spyder again. Let’s try running MatPlotLib to make sure that this works. Let’s use this example code
Unfortunately, looks like our MatPlotlib is now broken because the update Qt command we ran. We can reinstall MatPlotlib, but then it breaks the Qt again because of the update from Qt 5.6 to Qt 5.9. At the moment I don’t have a solution to this. Maybe Spyder will get updated to fix this issue with the new Qt problem. In the mean time, you can re-install Matplotlib and should be able to execute the code to generate a plot via X-11 output.